Email Inboxes
Create an Inbox, choose a Workflow or human reply, and see an Action that sends email. Read the transcript
An Email Inbox gives your workspace an address for receiving and sending email. You can reply yourself or route new threads to an Agent running a Workflow.
Create an inbox
- Open Connections → Inboxes and select New Inbox.
- Enter a name and address slug. Use lowercase letters, numbers, and hyphens for the slug.
- Choose the platform domain or a verified organization domain. For your own domain, complete Domains first.
- Choose Who answers: AI with a Workflow, a human, or Custom routing.
- Select Create Inbox and copy the address shown in the inbox.
Platform addresses include the workspace slug, such as support_example@gravityrail.net. Custom-domain addresses use the inbox slug, such as support@example.com.
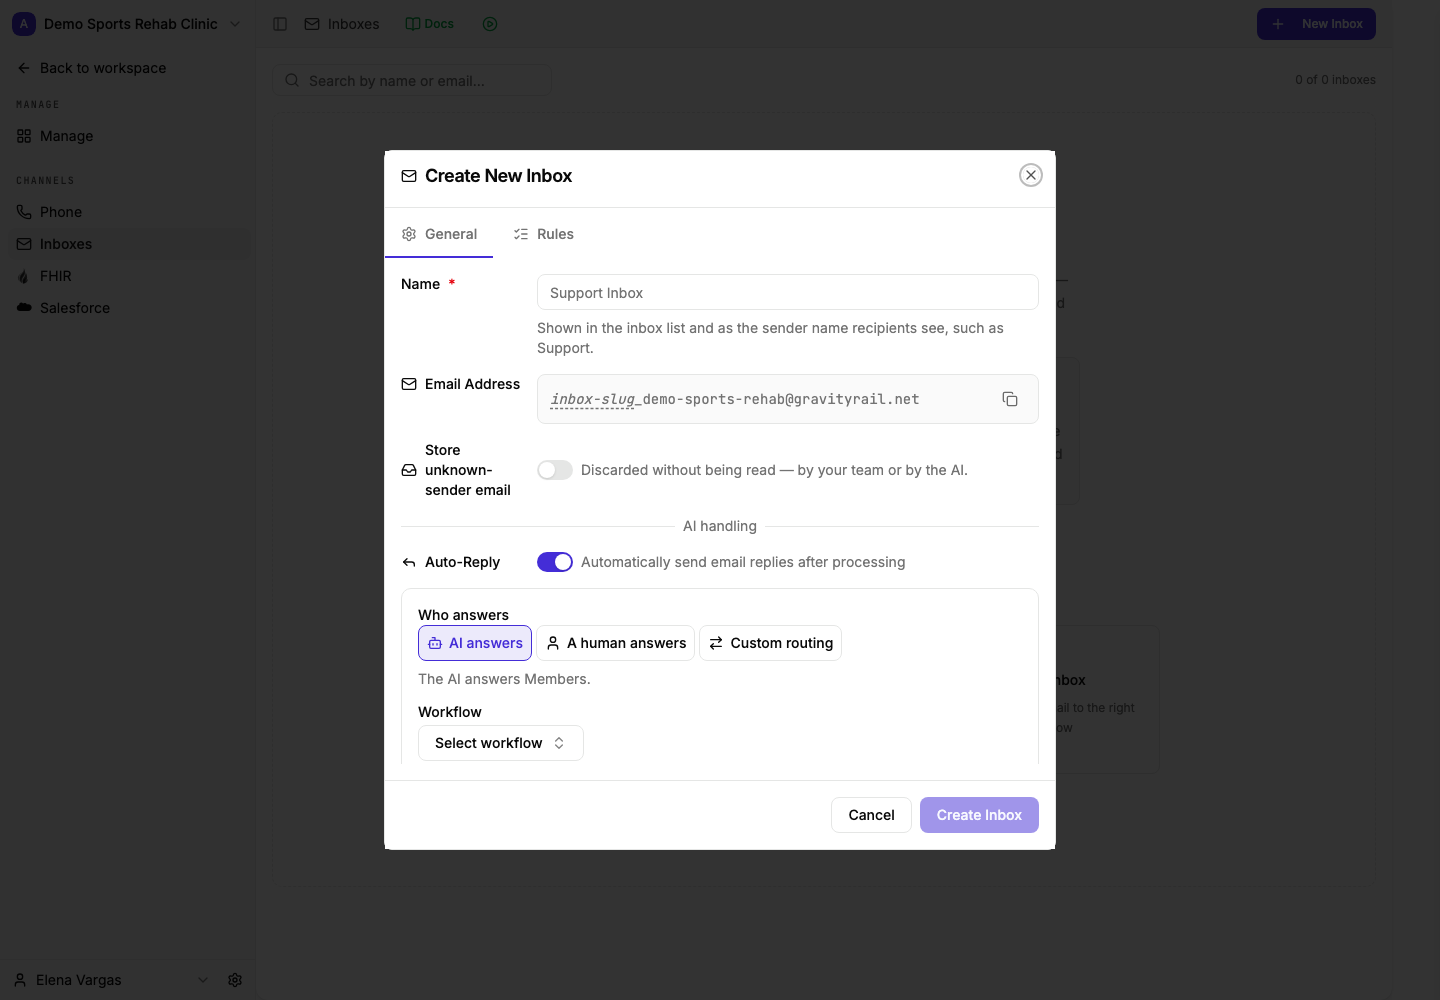
Off discards unknown-sender mail without anyone reading it. On retains it for staff review; it still does not go to the AI.
Choose whether to retain unknown mail separately from who answers Member mail.
View full size ↗The first label starts open. Hover or focus to explore; click or tap to pin.
Decide who answers
Open the inbox's Settings and edit its Email Routing Rules.
- Add a rule for the schedule and audience you want to handle.
- Choose AI with a Workflow, a human, This inbox's owner, or an auto-reply.
- Put specific rules before broader rules.
- Use Test to inspect saved-rule matching, then send a real test email to check the destination and reply. Test itself does not send an email.
Routing applies to new threads. Replies remain in the existing Chat.
Set an Owner if a Member or Agent should answer when no rule does. Rules that choose This inbox's owner also use that owner. Before clearing the owner, remove those rules or change them in the same save.
For a human-only inbox, choose a human answer rule or a human owner without an AI rule.
Mail from unknown senders
Use Store unknown-sender email to keep mail from addresses that are not Members so your team can read and reply. This switch does not allow AI to read or answer that mail. When it is off, unknown-sender mail is discarded.
Stop automatic replies
Turn off Auto-Reply if the assistant should process incoming Member mail without automatically sending a response. This does not turn the inbox into a human-only inbox; use routing for that.
Read and reply
- Open the inbox and select an email.
- Select Reply and write your response.
- Use Preview to check the message, footer, and quoted original.
- Select Send.
The reply is sent from the inbox address. If a Workflow handled the email, open its linked Chat to review or continue that work.
To redirect replies to a fixed address, open Settings → Rules → Recipient and choose Alternate email address. Check this setting before sending a test reply.
Insert an image
- In Compose or Reply, select Image.
- Upload an image, choose a workspace file, or enter an external image URL.
- For a workspace file, choose Embed to include it in the email or Link to load it from its public URL. Add alt text and insert the image.
Linking a workspace image requires that file to already be public and shareable. Use the file's Share dialog if you intend to change access; the email editor does not change sharing for you.
| Image limit | Maximum |
|---|---|
| Workspace image references, embedded or linked | 20 per email |
| One embedded image | 2 MB |
| All embedded images together | 6 MB |
Preview does not load externally hosted images, and recipient email clients may render the message differently. Send a test email to check the final appearance.
Edit HTML
Select Raw HTML when you need to edit the message markup directly. If the rich editor cannot represent that markup, switching back asks before simplifying it.
Set the footer
Open Settings → Rules and edit the inbox footer, then save. It replaces the workspace footer for mail sent from this inbox. Leave it empty to use the workspace footer again.
For workspace-wide wording, see Email settings. For personalized wording, see Template Variables.
Attachments
Received attachments appear with the email. An Agent using the Send Email ability can attach workspace Files. Those outgoing file attachments are limited to five files, 7 MB per file, and 7 MB combined. Embedded images have the separate limits above. For larger files, share a file link instead; see Files.
Restrict incoming mail
Open Settings → Rules → Filter Rules. These controls determine whether mail can reach the inbox; they do not select the answering Workflow.
Allow or deny senders
- Select Allow Rules or Deny Rules.
- Choose Use rules and add a sender-email or sender-IP condition.
- Enter the operator and value, add the rule, and save.
- Send test mail from an address you intend to allow and one you intend to block.
Email conditions support contains, equals, ends with, and regular expressions. IP conditions support an exact address or CIDR range. A list matches when any of its rules matches.
| Mode | Allow list | Deny list |
|---|---|---|
| All | Allow every sender | Deny every sender |
| None | Allow no sender | Deny no sender |
| Use rules | Require an allow-rule match | Reject a deny-rule match |
Mail must pass the allow setting and avoid the deny setting. Deny All blocks delivery even if the allow list accepts the sender.
Adjust sender rate limits
Select Rate Limiting to set per-minute and per-hour limits. Leave a custom limit empty to use the system setting for that window.
If a trusted sender needs an exception, add its exact email address or a domain pattern such as @example.com to the rate-limit allowlist. That exception bypasses rate limiting, not the inbox's allow/deny rules. Record a reason so your team can review the exception later, then save.
Check a missing email or reply
| Symptom | Check |
|---|---|
| Mail from an unfamiliar address is missing | Store unknown-sender email, allow/deny rules, and sender rate limits. |
| Mail arrives but no AI answers | The sender is a Member, an Email Routing Rule selects AI and a Workflow, and Auto-Reply is on. |
| A reply reaches an unexpected address | Recipient in the inbox's Rules settings. |
| The wrong footer appears | The inbox footer overrides the workspace footer. |
Permissions
Inboxes no longer have per-role access checklists. Role scopes apply Workspace-wide: inboxes:read lists Inboxes and allows using one as a receiving destination; inboxes:write allows creating an Inbox and authorizing automated sending from its address; inboxes:admin allows managing Inboxes and reading their messages.
Ownership and explicit individual grants still provide Inbox-specific access. In the app, reading stored mail also requires inboxes:read, editing an Inbox requires inboxes:write, and Compose, Send, and Reply require inboxes:admin. Being the Inbox owner does not replace these screen and action requirements.
A Send Email ability or Event Rule checks the configuring Member's permission to send from the inbox when it is saved. When it runs, it sends with that authority; Members served by the automation do not need inboxes:write.
For role setup, see Member Roles.