Forms
Define fields for structured information. Read the transcript
Use a Form when you want information stored in named fields. A document holds surrounding context; a Form defines the structured information to collect.
Before You Begin
- Have
datatypes:writeto create Forms; the built-in Manager role includes it. - Decide whether the Form stores fields per Member or shared Workspace records, and whether each record is singular or can repeat.
Create a Form
- Under Knowledge, open Forms and choose New Form.
- Name the Form for the information it collects. Choose Member for Record scope and Singular for Collection type in this example, then create it.
- Choose Add Field. Add a Text field named Visit type, then add another named Preferred contact.
- Choose Save changes.
- Open Entries to see where submitted records appear. Open Settings to review fields, record scope, Admin only, and Event Rules.
An Event Rule can run an Action when a record is created or updated. This walkthrough shows where the settings live; it does not create a Member record.
What You Should See
The Form has two named fields, and its Entries view is empty until records are submitted. Its Settings view contains the field, record scope, Admin only, and Event Rule configuration.
Use the reference below to choose record ownership and field types. To respond to a submitted record, see Automating Actions.
Record Scope
Each form has a Record Scope that determines who its records belong to:
| Scope | Behavior | Best For |
|---|---|---|
| Member | Records belong to individual members. Each member has their own records. | Profiles, intake answers, appointments, assessments — anything tied to a person. |
| Workspace | Records are shared workspace-wide configuration or reference data, not tied to any one member. Choose Singular for one shared record, or Collection for repeatable records; CEL reads the latest record. | Workspace settings, lookup tables, feature toggles, reference values used by automations. |
| Anonymous | Filled in by visitors who aren't members, for example from a QR-code poster. Each visit is a separate submission that can't be edited. | Letting people who can't sign in leave their details for the practice to follow up. |
Who can see records
Forms no longer have per-role access checkboxes. Record ownership, record scope, and the Admin only setting determine record access; role scopes still control staff actions.
- Member forms: each Member works with their own records. Reading another Member’s records requires
records:admin, a sharing grant that allows reading, or a relationship with chart access. Editing requiresrecords:adminor a grant that allows writing; chart-read access alone does not allow edits. Creating a record for another Member requiresrecords:write. - Workspace forms: every Member can read the records.
records:writeallows creating, editing, and deleting shared records; an explicit record grant can also allow editing or deleting. - Admin only: turn on Only Members with records:admin can see this Form in the Form's Access section to restrict records to Members with
records:admin. The Form owner and Members withdatatypes:admincan still manage its schema; that does not give them access to its records.
The synthetic example below shows the current Settings layout. Its fields differ from the two-field Form created above.
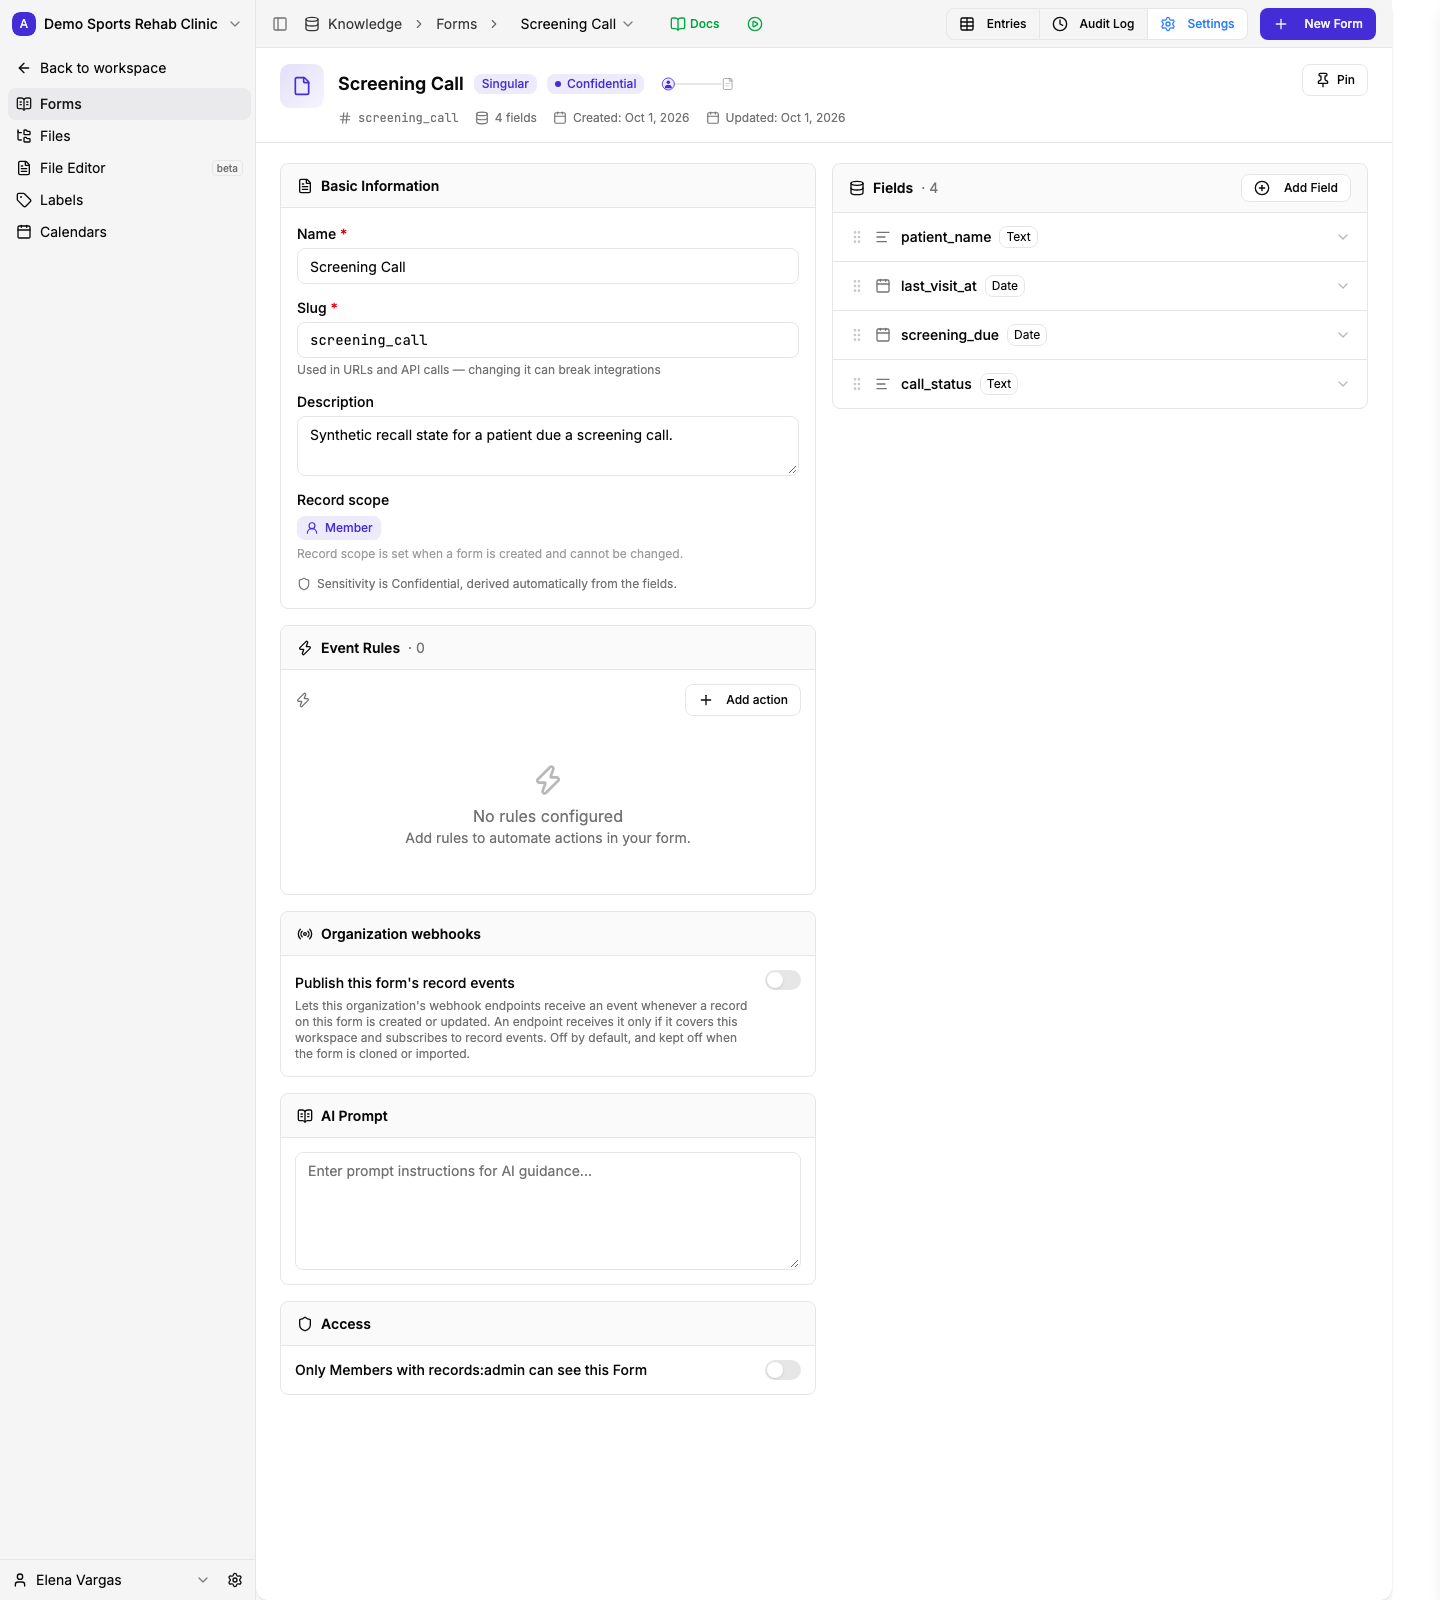
Member records belong to individuals. Workspace records are shared reference data; records:write allows creating and changing them.
Form Settings separates record ownership, field design, and the remaining Admin only restriction.
View full size ↗The first label starts open. Hover or focus to explore; click or tap to pin.
Anonymous Forms
An anonymous Form collects submissions from people who aren't members — nobody signs in. To offer one to visitors, choose it as the Anonymous Form on a Site (see Sites).
- Choose it when you create the Form. A Form can't be switched to or from Anonymous afterwards.
- Same form builder. Add fields as for any other Form. Fields marked admin-only, computed fields, and array or object fields are never shown to visitors. Anonymous Forms may include health information.
- Entries are read-only. The Entries tab lists submissions, newest first, with the date and whether each came through a Site. Submissions can't be edited or deleted, and there is no audit tab or per-entry history. Seeing the tab requires the
anonymous_submissions:readpermission, which Managers have by default. - Nothing happens automatically yet. Anonymous Forms have no Access settings and can't have Actions (event rules), and a submission doesn't create a member or start a workflow. Someone has to check the Entries tab.
- Not available elsewhere. Anonymous Forms don't appear where a Form's records are created or used — member record tabs, automations, sync rules, or dashboard record lists.
Workspace-scoped records are exposed to CEL automations under workspace.form_data.<form_slug>.<field> for singular Forms and workspace.collections.<form_slug>.latest.data.<field> for collections. See Using CEL Expressions for the access pattern and workflow examples, and the Developer CEL reference for context-specific paths and types.
Field Types
Each form contains fields that define what data to collect. Add fields by clicking Add Field in the form editor. Each field is one row showing its name, type, and description, with a red asterisk when it's Required and icons when it's Searchable or Admin only. Hover a row to copy its identifier or delete the field. Select anywhere else on the row to open its settings underneath, and select it again to close them:
- The question — the field's name and type, then the asterisk button that makes the field Required (it turns red). Function fields have no Required button, because they're calculated.
- What it collects — choices or the expression for the field's type, the description, the default value, and an optional validation expression.
- Privacy & access — sensitivity and categories, Admin only, and Searchable.
- Identifier — the field's identifier, at the bottom. For a saved field, use the ⋯ menu beside it to Rename identifier....
A new field opens with its name selected, ready to type.
Changes apply as you make them and are saved with the Form; until then, an orange dot shows in the Fields header and a yellow bar marks the left edge of each changed or added field.
| Type | Use For | Example |
|---|---|---|
| Text | Short text (single line) | Name, address |
| Long Text | Multi-line input | Notes, descriptions |
| Validated email address | Contact email | |
| Phone | Phone number | Mobile, office number |
| Number | Decimal values | Weight, temperature |
| Integer | Whole numbers | Age, count |
| Date | Calendar date | Date of birth, appointment date |
| Date & Time | Date with time | Appointment timestamp |
| Time of Day | Time only | Office hours start |
| Dropdown | Single choice from a list | Status, category |
| Multi-select | Multiple choices from a list | Symptoms, interests |
| Yes/No | Boolean toggle | Consent, eligibility |
| ZIP Code | US ZIP code | Mailing address |
| Function | Auto-calculated value (see Computed Fields) | Score total, BMI |
Field Settings
Every field has these configurable settings:
| Setting | What It Does |
|---|---|
| Name | Display label for the field |
| Slug | API identifier (lowercase letters, numbers, underscores only). Locked once the field is saved, because stored answers are kept under it. |
| Description | Help text shown to users and AI agents |
| Required | Makes the field mandatory — the AI will keep asking until it gets a value |
| Default Value | Pre-populated value for new records |
| Admin Only | Hides this field from non-admin members |
| Searchable | Enables search indexing so records can be found by this field's values |
| Categories | The kinds of data the field holds, such as health information. Some categories raise the minimum sensitivity. |
| Sensitivity | How restricted the field's values are. Choose the least restrictive level that accurately describes the field. |
Dropdown and Multi-select Options
For Dropdown and Multi-select fields, you define a list of options:
- Label — What's displayed to the user
- Value — What's stored (can differ from the label)
- Visible When — Optional CEL expression to conditionally show/hide an option based on other field values (e.g.,
record.data.category == "urgent")
You can add options one at a time or use Bulk Mode to paste multiple options at once.
Collections vs. Single Records
The Collection toggle changes how the form behaves:
| Mode | Behavior | Best For |
|---|---|---|
| Single (off) | One record per person | Profile info, intake forms, preferences |
| Collection (on) | Multiple records per person | Appointments, orders, assessments |
In the UI, single-record forms show as a form view while collections show as a table of entries.
Using Forms in Workflows
Attach forms to tasks in your workflows so your AI agent can collect data naturally through conversation.
- Create or edit a Task in the workflow editor
- In the task settings, attach a form under Data Collection
- The AI uses the form's Prompt field for context on how to collect the data
- During conversation, the AI asks for each field and validates responses automatically
The AI adapts to the conversation flow — it doesn't rigidly go field by field. It can collect multiple values from a single message and ask follow-up questions when needed.
Validation
Beyond basic required/type validation, you can add custom validation rules using CEL expressions. Set a validateCel expression on any field to enforce business rules.
Form validation has its own CEL context. See the Developer CEL reference for its variables and available functions.
Available variables in validation expressions:
| Variable | Description |
|---|---|
value | The current field's value |
record.data.<slug> | Another field's value in the same form |
member.id | Current member's ID |
member.name | Current member's name |
member.labels | List of label slugs on the member |
now.year, now.month, now.day | Current date components |
The expression should return true if valid, or a string error message if invalid.
# Ensure date is in the future
value > now.year * 10000 + now.month * 100 + now.day

# Ensure score is within range
value >= 0 && value <= 100
Bulk Import & Export
Import records in bulk from CSV files:
- Open the form and go to the Entries tab
- Click Import and upload a CSV file
- Review the import result and correct then re-upload any rows that failed
The bulk importer supports up to 10,000 records per batch. It can create new records or update existing ones. The import result counts every row as created, updated, unchanged or failed.
An export's Record ID column identifies each record, so you can edit an exported file in a spreadsheet and import it back: each row updates its own record, and unchanged rows change nothing. Rows without a Record ID update the record with the same External ID, or create a new record. To add copies of exported rows, clear their Record ID cell (or delete the column) and clear any External ID that belongs to an existing record — otherwise the row still updates that record. If the same Record ID appears on two rows, the later row is skipped and listed in the import result. A file exported before Record IDs were added can only update rows that have an External ID; export the form again to update the rest.
Blank cells never erase a saved value. To clear a value, edit the record in the form.
If a row has any value that isn't valid (for example, text in a number field), that whole row is skipped and listed in the import result. The other rows still import.
To export, click Export on the Entries tab to download all records as CSV.
Every export ends with an empty column named Gravity Rail Export v1. Keep that column when you re-import an exported file. Without it, a value in a text field that starts with =, +, - or @ keeps the leading apostrophe the export added to stop spreadsheets treating it as a formula. A row with a list field written the way exports write lists (for example ["a","b"]) is skipped and listed in the import result: keep the column, or type the list as comma-separated text (a, b).
Events & Automations
Forms trigger events you can use with Actions:
| Event | When It Fires |
|---|---|
| Record Created | A new record is submitted |
| Record Updated | An existing record is changed |
Use these events to trigger notifications, webhooks, or other automated actions. Target specific forms using conditions in your action rules.
Referencing Form Data
Access form data in template variables and messages:
{{member.data.<form_slug>.<field_slug>}}
For single-record forms, this returns the field value directly.
For collection forms, use member.collections for structured access to a member's lifetime records:
{{member.collections.<form_slug>.count}}
{{member.collections.<form_slug>.latest.data.<field_slug>}}
{{member.collections.<form_slug>.latest.created_at}}
Loop through recent records (up to 10):
{% for record in member.collections.<form_slug>.recent %}
  - {{record.data.<field_slug>}} ({{record.created_at}})
{% endfor %}
When working inside a workflow assignment, use assignment.collections to access only the records linked to the current assignment (i.e. the current call or visit), not the member's entire history:
{{assignment.collections.<form_slug>.count}}
{{assignment.collections.<form_slug>.latest.data.<field_slug>}}
{{assignment.collections.<form_slug>.latest.created_at}}
Use assignment.collections.* for per-encounter checks (e.g. "what did the agent collect on this call?") and member.collections.* for lifetime history (e.g. "has this member ever submitted intake?"). For CEL edge conditions and a comparison table, see Using CEL Expressions.
See the Template Variables guide for more details.
Related
- Knowledge — Overview of all Knowledge features
- Computed Fields — Auto-calculated formula fields
- Actions — Trigger automations from form events
- Template Variables — Use form data in messages
For developers
- Data Types API — define and manage Forms (Data Types in the API)
- Data Records API — read and write the records collected by a Form
- Importing Data guide — bulk-load records into a Form
Filter Form Entries
Use Form Filters to filter the entries in a Form, save the conditions, and reopen that view. To select Members using their Form data instead, use Member Filters.